DrSharpe Health
A respiratory mask can look secure while leaking around the nose, cheeks, or chin. That small gap can reduce protection when airborne dust, aerosols, or hazardous particles are present. Learning How to check the seal of a respiratory mask is therefore a practical safety skill, not a cosmetic inspection.
The U.S. Occupational Safety and Health Administration (OSHA) requires a user seal check every time a tight-fitting respirator is donned. Its Respiratory Protection Standard, 29 CFR 1910.134, also requires fit testing before initial use, after significant changes, and at least annually. The National Institute for Occupational Safety and Health (NIOSH) distinguishes a user seal check from a formal fit test. One confirms the day’s fit. The other evaluates whether the selected model and size provide adequate protection.
Check the seal before exposure begins. Clean, dry skin helps. Facial hair, eyeglass frames, hood edges, and damaged straps can interfere with contact. A negative-pressure check should pull the facepiece slightly inward when inhaling gently. A positive-pressure check should create slight outward pressure without air escaping. Stop if you feel leakage.
Do not rely on comfort alone. Comfort can mislead. A mask may feel tight yet leak during movement, talking, or bending. This is where many guides become too simple: one quick breath is not enough for every wearer. This article explains the seal-check process, common failure points, and when professional fit testing is necessary. Always follow the manufacturer’s instructions and workplace respiratory-protection procedures.
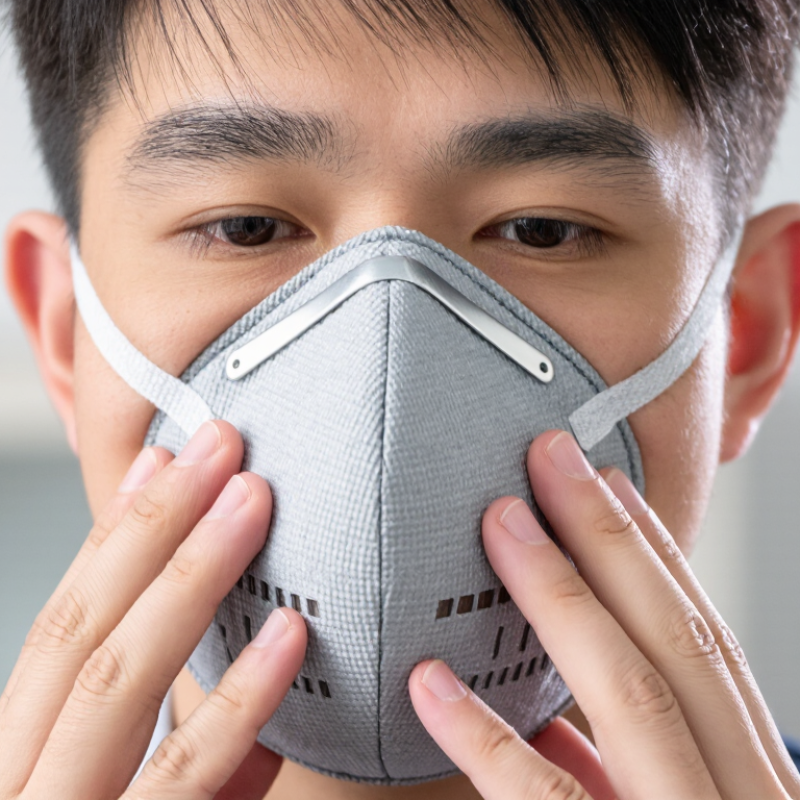
How to Check the Seal of a Respiratory Mask?
Understanding Respirator Mask Seal Checks
A respirator mask must seal against clean, dry skin to work as intended. Before each use, inspect the mask, straps, valves, and sealing surface for damage or dirt. Facial hair, glasses, head coverings, and deep wrinkles can create small leakage paths. They may feel harmless. They are not.
Place the mask over your nose and mouth, then adjust the straps evenly. Do not pull them painfully tight. For a negative-pressure check, cover the filter surfaces and inhale gently. The mask should draw slightly toward your face. For a positive-pressure check, cover the exhalation area and breathe out gently. Air should not escape around the edges. Stop if you feel leaks, dizziness, unusual breathing resistance, or strong odors. Leave the contaminated area when necessary.
A seal check is different from a fit test. It only confirms the mask fits correctly at that moment. A qualified professional should perform formal fit testing when workplace rules require it. Fit can change after weight loss, dental treatment, facial injury, or changing mask size. Many people rush this step, especially in cold weather. That is an easy mistake to repeat. Practice with clean hands and a mirror. If the seal fails twice, replace or refit the mask instead of forcing it.
Understanding Respirator Mask Seal Checks
A user seal check should be performed every time a tight-fitting respirator is donned. Cover the filter surfaces or cartridge inlets, then inhale for a negative-pressure check or exhale for a positive-pressure check. The face seal should remain stable without noticeable air leakage. The fit-factor values shown are minimum quantitative fit-testing requirements under OSHA 29 CFR 1910.134: 100 for half-mask respirators and 500 for full-facepiece respirators. A seal check does not replace a formal fit test.
How to Check the Seal of a Respiratory Mask?
Before testing, prepare both the mask and your face carefully. A seal check cannot correct a damaged mask or poor preparation. Wash your hands, then inspect the mask under bright light. Look for torn edges, cracked fittings, stretched straps, or dirt on the sealing surface. The mask should be dry and free from makeup, oil, and moisture.
Dry skin matters. Facial hair can prevent the sealing edge from touching the skin evenly, especially around the nose and chin. Long hair should be tied away from the sealing area. Adjust glasses, head coverings, or other equipment that may press against the mask. They can create small gaps that are difficult to notice. Choose the correct size according to the manufacturer’s instructions. Do not force a mask that feels unusually tight.
Place the mask over your nose and mouth, then position the straps without twisting them. Shape the nose area gently with both hands. Do not press only one side. Breathe normally and notice whether air escapes near your cheeks or eyes. Stop and readjust if the mask shifts while speaking or moving your head. I have found that rushing this step creates false confidence. A mirror helps, but it cannot replace careful breathing and a proper user seal check. If the mask still leaks, do not continue relying on it.
How to Check the Seal of a Respiratory Mask? Positive-pressure checking is a practical step before entering a contaminated work area. After positioning the mask, tighten the straps evenly. Do not over-tighten. For a respirator with an exhalation valve, cover the valve gently with your palm. For a filtering facepiece, cover its surface with both hands. Breathe out slowly. You should feel slight pressure inside the mask. No air should escape around the nose, cheeks, or chin. A soft hiss means the seal needs adjustment.
This check is not a fit test. OSHA’s Respiratory Protection Standard, 29 CFR 1910.134, requires a user seal check every time the respirator is donned. It also requires fit testing before use and at least annually, or after major changes in facial condition or equipment. NIOSH guidance warns that seal checks cannot prove full protection. Facial hair, eyewear, sweat, and movement can disturb the seal. A quick check can still be misleading. That is where workers often need to slow down.
Tips: Check the mask in the same order each time. Use clean, dry hands. Speak, turn your head, and bend slightly after the check. If leakage appears, remove and refit the respirator. Never rely on a damaged strap or distorted facepiece. Small mistakes matter. Record failed checks and report repeated problems to the respiratory protection program administrator.
| Step | Seal-Check Dimension | What to Do | Acceptable Result | Corrective Action if the Check Fails |
|---|---|---|---|---|
| 1 | Preparation | Inspect the facepiece, straps, valves, and sealing surface. Make sure the respirator is clean, undamaged, and correctly assembled. | No visible tears, cracks, holes, distorted parts, or missing components. | Do not use a damaged respirator. Replace or repair it according to the applicable instructions. |
| 2 | Correct positioning | Place the respirator over the nose, mouth, and chin. Adjust the straps so the facepiece is secure but not excessively tight. | The sealing surface lies smoothly against the skin without folds, gaps, or rolled edges. | Reposition the facepiece and readjust the straps evenly. |
| 3 | Obstruction check | Check that hair, facial hair, eyewear, head coverings, or other items are not trapped under the sealing surface. | Nothing interferes with continuous contact between the face and the seal. | Remove or reposition the obstruction. A tight seal may not be possible over facial hair in the sealing area. |
| 4 | Block the air outlet | Use clean hands to gently cover the exhalation valve or other intended air outlet, if the respirator design includes one. For models without an exhalation valve, follow the device-specific method. | The outlet is covered without damaging the valve or changing the facepiece position. | Stop if the respirator cannot be covered as instructed; consult the applicable user instructions. |
| 5 | Gentle exhalation | Exhale gently while keeping the outlet blocked. Do not forcefully blow or create discomfort. | Slight positive pressure is felt inside the facepiece, and the facepiece may bulge slightly without air escaping around the edges. | If air leaks around the nose, cheeks, chin, or other edges, stop and refit the respirator. |
| 6 | Leak-location check | Pay particular attention to the bridge of the nose, sides of the face, under the chin, and areas near valves or connectors. | No noticeable air movement, hissing, or loss of pressure at the sealing surface. | Reposition the mask, smooth the seal, adjust the straps, and repeat the check. |
| 7 | Repeat after adjustment | Repeat the positive-pressure check every time the respirator is put on and whenever its position is disturbed. | The check passes consistently after refitting. | Do not enter or remain in a contaminated area if a satisfactory seal cannot be achieved. |
| Important | Limitations of the check | Use the positive-pressure method only when it is suitable for the specific respirator design and permitted by the instructions. | A user seal check is a quick user check, not a substitute for a formal fit test. | Follow workplace respiratory-protection procedures and complete the required fit testing before use. |
A negative-pressure seal check helps confirm that a tight-fitting respiratory mask sits correctly on your face. Perform it every time you wear the mask, especially after adjusting the straps or moving your head. Wash your hands, inspect the mask, and check for cracks, damaged edges, or blocked valves. Facial hair, glasses, and uneven straps can create small gaps.
Place the mask over your nose and mouth, then tighten the straps without making them painful. Cover the filter surfaces or air inlets with your hands. Inhale gently and hold your breath for several seconds. The mask should pull slightly toward your face.
You should not feel air entering around your nose, cheeks, or chin. Listen carefully. A faint hiss may reveal a leak.
If the seal fails, reposition the mask and adjust the straps evenly. Repeat the check. Do not continue using it if the leak remains. Not every respirator supports this method, so follow the product’s instructions and workplace procedures.
This check cannot replace a formal fit test, which uses controlled methods to assess the correct size and model. I still pause when a mask feels comfortable, because comfort alone proves very little. A rushed check can seem convincing, yet small leaks are easy to miss.
A trained safety professional should investigate repeated failures or unusual breathing resistance.
A good seal begins with the correct mask size and clean, dry skin. Place the mask over your nose and mouth, then adjust the straps evenly. The mask should feel secure, not painfully tight. Check the edges with a mirror. Look for gaps near the nose, cheeks, and chin.
Cover the filter surface with your hands, if the mask design allows it. Breathe in gently and notice whether the mask pulls slightly toward your face. During an exhalation check, watch for air escaping around the edges. A warm stream near your eyes or cheeks suggests a poor fit. Do not rely on smell alone. It is not a dependable seal test.
Facial hair, glasses, head movement, and loose straps can create small leaks. Trimmed hair may still interfere with the sealing area. Remove anything trapped under the edge, then reposition the mask and repeat the check. If the leak remains, try another size or model suited to your face. A professional fit test provides stronger evidence than a quick home check. The process is easy to rush, and that is where mistakes happen. A mask that feels comfortable may still leak during walking, speaking, or bending. Stop using it in a hazardous setting until the seal problem is corrected.
Wash your hands. Clean and dry your face. Remove makeup, oil, and moisture from the sealing area. Tie long hair away from the mask edge. Facial hair can create small gaps.
Check it under bright light. Look for torn edges, cracked fittings, stretched straps, and dirt. Do not use a damaged or dirty mask. A seal check cannot repair damage.
Cover your nose and mouth fully. Place the straps evenly, without twisting them. Shape the nose area gently with both hands. Do not press only one side.
Breathe normally and watch the mask edges. Feel for warm air near your eyes, cheeks, or chin. A mirror can reveal visible gaps. Smell is unreliable.
If the design allows it, cover the filter surface with your hands. Breathe in gently. The mask should pull slightly toward your face. If it does not, readjust the mask.
Stop and remove anything trapped beneath the edge. Adjust the straps and nose area. Repeat the check. If leakage continues, try another suitable size or model. Do not rely on a leaking mask.
Yes. Glasses and head coverings may press against the edge. Speaking, walking, bending, or turning your head can expose leaks. Check the mask while moving naturally. Comfort alone proves little.
It provides stronger evidence than a quick home check. Consider one when the mask repeatedly leaks. A professional can assess size and fit more carefully. I may still miss a tiny gap at home. Slow down.
How to check the seal of a respiratory mask is an essential skill for ensuring effective protection. Before testing, inspect the mask for damage, confirm that the correct size is being used, and make sure the face is clean and free from anything that could interfere with the sealing surface, such as facial hair, glasses, or loose clothing. Adjust the straps and position the mask comfortably over the nose and mouth.
For a positive-pressure seal check, cover the mask’s exhalation area and gently exhale. The mask should slightly expand without noticeable air escaping around the edges. For a negative-pressure check, block the air inlets and inhale gently; the mask should draw inward and remain close to the face. If air leaks, readjust the straps, reposition the mask, or try a different size or style. Persistent leakage means the mask does not fit properly and should not be used until the seal problem is corrected.